In this article we will be showing you how to clean Canon printheads. This is not the easiest task because a lot of Canon printers use their own built-in printheads, instead of ones on the installed on the cartridges themselves. However, if you pay close attention to the steps mentioned in this article, you won’t have too much trouble cleaning your printheads!
The main benefit of cleaning the Canon printhead yourself is that you save a lot of ink that would otherwise be wasted by running multiple maintenance rounds through your printer software. Manual cleaning is also a lot more thorough compared to the automatic cleaning process your printer may perform, which in turn gives your printer a longer lifespan!
Attention:
While nothing can go wrong when you follow our guide closely, you’ll still be doing this at your own risk!
Step 1) Opening your printer
Open your printer up. Open the top latch as if you were going to perform a cartridge-swap. If your printer is switched on, the cart will automatically move itself towards you for easy access.
Step 2) Remove the cartridges
Wait till the cart stops moving. You will see that 5 cartridges are installed. Pigment black, black, yellow, magenta and cyan. Carefully remove the cartridges from the printer. You do this by pushing on the little latch on the front-side of the cartridges. They will snap loose from the printhead for easy removal.
Be careful, the cartridges may leak ink. Printer ink is very stubborn and hard to wash out of clothing, so make sure the nozzles don’t touch any surfaces you would like to keep clean. We recommend placing the removed cartridges on a paper towel.
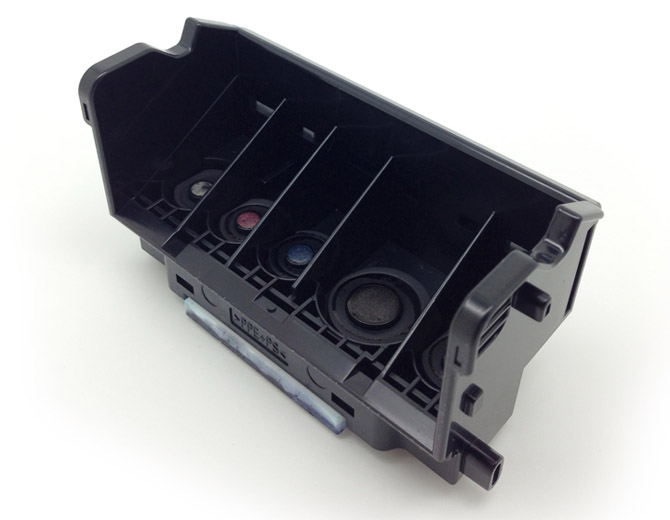
Step 3) Remove the printhead
Pictured below is a printhead. To remove this, you must pull the latch back. After this step you can remove the printhead from the cart. Angle the printhead forwards and pull it towards you. It should come out without hassle. If you feel any resistance, make sure the locking mechanism has properly let go of the printhead.
Step 4) Clean the printhead
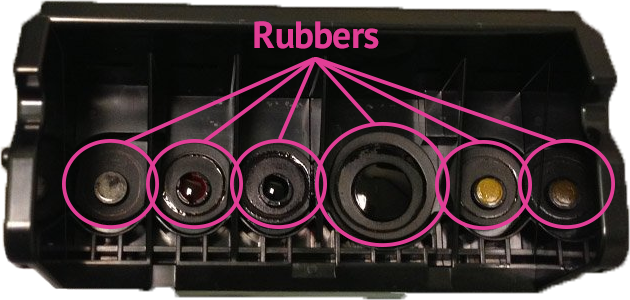
Pull off the rubbers one by one. The rubbers are marked in the above image. It is now time to clean the printhead. Turn on a tap with hot water and clean the printhead by putting it under. Turn the printhead around and clean all sides. It may take a while but once there is no more ink residue coming out, you’re finished.
Let the printhead dry, or dab it dry using a towel. If you decide to use a hair dryer, make sure it’s not set to hot! This can melt or break components inside the printhead. Make sure there is no dust or paper pieces on or in the printhead. Now put the little rubbers back in.
Step 5) Reinstall the printhead
Put the printhead back inside the printer by following step 3 in reverse. Reinstall the cartridges. Once you close the printer you will hear the cart move itself inside the printer.
Step 6) Run a maintenance procedure
Within the Canon printer software, you can run a maintenance procedure, and realign the printhead. Make sure you run both procedures to ensure the ink flows through the printhead properly.
After this procedure you’ve manually removed all the ink- and paper residue from your printer. This is something an automatic maintenance procedure just can’t do. Print a test page and see your result!


Heel duidelijk bedankt. Nu nog hetzelfde verhaal hoe de printhead van het diskprintgedeelte te reinigen. Nergens iets over te vinden